Thursday, February 28, 2013

Bird and Fish

These past couple weeks have been quite interesting. As much as I have been planning to spend time in the woodshop things keep getting in the way. On monday I had a large reading to get finish, on wednesday we had our schools diversity day which meant that I had no classes and today I went home sick. That hasn't stopped me from drawing though I have done a bunch of drawings over the past 4 or five days and I got a carving finished on Tuesday. Here is a picture of a couple drawings and another of the first sketch on wood of my carving.


A draft of the carving to come

My next carving


This is a picture of the carving I just finished in its early stages. If you look closely you can see my guide sketch and the early carving I have completed. All of the carving you see in the picture has been done by my own knife. It is a very special feeling to make these carvings with you own knife. The rest of the work was done with crooked knifes as well as some final touches with a veiner. In this carving I focused on making it clean without any wood fibers taking away from the smooth carved surface. I will post the finished pictures soon!

Thursday, February 14, 2013

Clay and Wood

I've finally started my study of combining wood and clay forms.  For the past couple days I have been looking through books on form line design and creating wood cutouts of classic Coast Art shapes for imprinting in clay. I've only just begun but I have found that bigger shapes are not only more aesthetically pleasing but I then have to opportunity to carve into the clay. Here are a couple preliminary pictures, more to come! This is a bit of a picture overload but mixed in are a couple sketches I did for shapes to cut.


Ready to Cut

I just finished up the knife and I am super happy with it. It has a great handle and the blade ended up working very well. The final steps of the process weren't incredibly difficult they just took time. First I had to drill a hole through the handle for a brass rivet to really set the blade in the handle. I did this with the drill press, using the half of the handle with a hole already cut as my guide. After that I took a piece of 1/8th in. brass rod and drove it through the hole. I then used a ball peen hammer and the anvil we have in the shop to mushroom the brass rod and smooth it into a nail head. Here is a picture of the finished product.


Thursday, January 31, 2013

Finishing

The knife is basically finished! Woohoo! It is sitting in the shop right now and has a coat of salad bowl finish on it. I tried out a couple cuts with it and it cuts like butter which is great! The blade is a slight different shape than originally expected but I like it and think it will work out well. Tom tells me there is something supremely satisfying about using a tool you made from scratch and he is right.

The last couple steps took awhile because I wanted to make the blade perfect and the handle really smooth. I spent almost a week of my time in the shop sanding and re-sanding as well as reshaping the blade. Then I drove some brass rivets into the holes I created and spent about 30 minutes smoothing the ends with a ball peen hammer which was quite repetitious and soothing. I'm about to go down to the shop and take some pictures of the final project and now I am working on drawings for my ceramics and woodworking joint project. More posts and pictures to come!

Wednesday, November 28, 2012

A New Handle on Things


The knife in the handle                                                       

The Rough handle again
I set the knife in the handle a couple days ago. The handle is a beautiful piece of Yew that Tom found for me in the back corners of the shop. I cut a strip off of it, planed it, then cut it in half and routed a groove in one side that would fit the knife. After that I took an epoxy and glued the two halves together. Now I am working on the shape of the handle. Ideally it will fit my hand well and stay symmetrical. I cut the whole groove in one side instead of cutting half in each side so I have to cut one side about an eighth of an inch more so the blade will be in the middle. I'm getting close to being finished with the knife now and onto another piece which will be a clay piece where I use Native American Styles of woodworking to create a clay box.

Saturday, November 3, 2012

Ground, Not Sharpened

Blade in the Handle

Unpolished

Polished to 300 grit

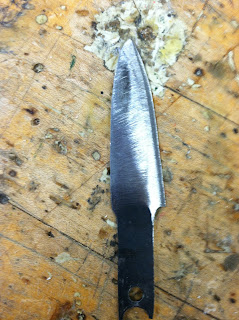
Well I only got down to the shop twice this week, but I did get a lot done on my knife. I was able to create the basic shape for my handle, cut the groove where the blade will rest in the handle and ground the blade more. The blade is now polished to 300 grit and almost ready for its first sharpening! More pictures to come!

Glazed, Fired.


I brought home the glaze fired chop yesterday. I used a green underglaze with an "ocean spray" regular glaze. I think it ended up pretty cool looking. The ocean spray kind of took over the piece but the green underglaze adds a nice tint to the piece.